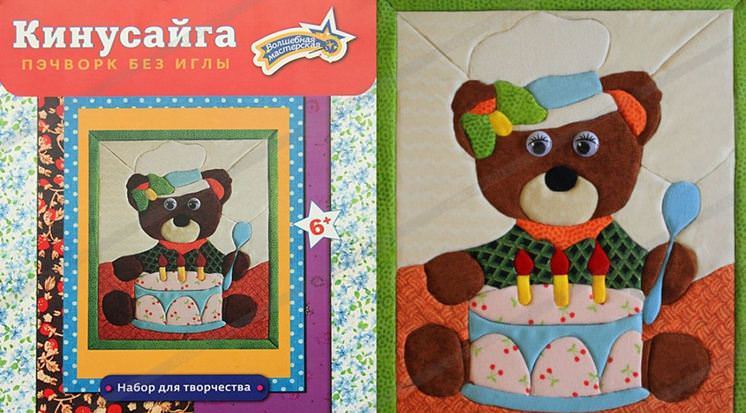
Painting using the Kinusaiga technique. Master class with step-by-step photos.
Shabanova Marina Gennadievna, teacher primary classes, MBOU Sarasinskaya secondary school, Sarasa village, Altai district, Altai TerritoryDescription of material: this material will be useful for teachers additional education, parents and everyone creative people who love to create beautiful and unique things with their own hands. The work can be done with primary and secondary children school age(older children can also handle this technique preschool age).
Purpose: interior decoration for the holiday, gifts, participation in competitions.
Target: making a painting using the Kinusaiga technique.
Tasks:
Educational: develop skills and practical skills in working with various types fabrics.
Educational:
- develop artistic taste, Creative skills, fantasy, imagination;
- develop fine motor skills hand, eye, spatial imagination;
Educational:
- instill interest in art, arts and crafts;
- cultivate independence, patience, perseverance.
For work you will need the following materials and tools:
- penoplex 27cm x 27cm x 3cm;
- pieces of fabric (can be used);
- scissors;
- manicure file (another manicure tool or plasticine stack);
- stationery knife/cutter (preferably narrow);
- pencil;
- iron ruler.

Rules safe work with scissors
1. Keep your work area tidy.
2. Before work, check the serviceability of the tools.
3. Do not use loose scissors.
4. Work only with a serviceable tool: well-adjusted and sharpened scissors.
5. Use scissors only in your own workplace.
6. Watch the movement of the blades while working.
7. Place the scissors with the rings facing you.
8. Feed the scissors rings forward.
9. Don't leave scissors open.
10. Store scissors in a case with the blades facing down.
11. Don't play with scissors, don't bring scissors to your face.
12. Use scissors as intended.
Rules for safe work with a stationery knife
1. Extend a small part of the blade.
2. Work with a stationery knife on a work board.
3. When making cuts, hold the knife firmly with one hand and the material you are working with with the other.
4. When the knife is not in use, the blade should be hidden inside.
On a square of penoplex we mark the frame. We retreat 3cm from each edge, mark with a pencil, and through the marking points with a cutter using an iron ruler we make cuts to a depth of approximately 5mm.

On the reverse side we draw frame lines the width of the ruler.

We make cuts from the intersection lines of the frame to the corners. We also make cuts on the end side in the corners.

Let's prepare a printout. My printer is black and white, but this does not interfere with subsequent work.

We overlay the diagram on the inner square. For beginners, you can secure the pattern with safety pins.

With a blunt pencil we outline all the main lines of the drawing. Note. When transferring an image to penoplex, many people use carbon paper. It seems to me, but this is only my subjective opinion, that this creates unnecessary dirt.

Having removed the diagram, the pencil lines are clearly visible.

Using a utility knife, cut slits along the contour to a depth of approximately 5mm. We widen the slits with a manicure file.

Using a nail file, we press the fabric into the slits. I started with the weed, you can start with any other part.

We cut along the contour with scissors, leaving 2-3mm.

We set the edges into the slots with a manicure file.

You can create several details at once.

Small details: straighten the fabric, cut along the contour, additionally trim the corners to avoid pitting in the picture.

We insert the fabric into the slits.

I decided to make the flower two-color. First, I set the parts of the same color.


Then a different color.

We draw up the middle.

When designing several parts of the same color located next to each other, you can use the following technique: we insert the fabric into all the parts IMMEDIATELY.

Cut along the contour. Let's set it up.

We continue to work on the same principle.

The inside of the wings is ready.

The outer part of the wings was made of plain fabric.

You can change the order in which you fill in the details. I started making the second butterfly from the outer contour.

Then I filled the inside.

Filling the background. We select the appropriate fabric. We press them into the slots with slight tension to avoid wrinkles.

The background is filled. Both large and small fragments.

All that remains is to make the frame. If the size of the fabric allows, you can lay out two sides of the frame at once.

We adjust the fabric on the corner on both sides.

On the reverse side, we straighten the fabric with slight tension. Folds and wrinkles on the knitted fabric become invisible.

We cut the fabric with an allowance.

We create a broach corner. We thread the fabric from the reverse side.

From the front side.

The corners around the edges look like this.

Carefully insert the fabric into the slot.

We design the second part of the frame in the same way. The corner will look like this.

Carefully insert the fabric into the slot in the corner of the picture.

On the reverse side we make a pendant. You can use braid or soutache. We insert the ends of the suspension into the slots of the frame. It is advisable to apply “Titanium” type glue to the attachment points, directly in the slots. I use a nail file for this.

As an example, I’ll give you a couple more photos. It happens that the fabric is not set very carefully.

You can always fix things with a nail file.
Kinusaiga is a patchwork without a needle, and patchwork is a technique in which a whole product is made from pieces of fabric. As you may have guessed from the name, Kinusaiga is a Japanese technique like origami and kanzashi. In this article we will look at how to make a painting using the Kinusaiga technique with your own hands. It is worth noting that the fabric must be thin and non-stretchable, for example: silk.
You will need: polystyrene foam, scraps of fabric of various colors, ruler, scissors, glue stick, stationery knife, nail file, carbon paper, felt-tip pen, push pins.
Master Class

The original painting using the Kinusaiga technique is ready! I recommend watching this video!

You will need: a template for a panel, a board, polystyrene foam, scraps of fabric of various colors, a ruler, a simple pencil, scissors, a glue stick, a stationery knife, a nail file, carbon paper.

Master Class

The kitchen panel using the Kinusaiga technique is ready! I recommend watching this video!

You will need: a template for a panel, a board, polystyrene foam, scraps of fabric of various colors, a ruler, scissors, a glue stick, a stationery knife, a nail file, a simple pencil.
Master Class

The panel for the children's room using the Kinusaiga technique is ready! I recommend watching this video!
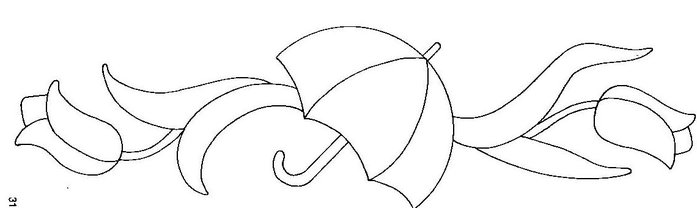
Kinusaiga schemes
As you understood from previous master classes, all paintings using the Kinusaiga technique are made according to the same principle. The difference between kinusaiga paintings directly depends on the chosen pattern or scheme. If the picture is large in size, contains a huge amount various parts, all kinds of bends - it will be difficult for a beginner to do quality work the first time. Start with the simplest thing, and then move on to the complex process and then everything will work out. Now look through the diagrams for creating delightful masterpieces using the Kinusaiga technique.
Kinusaiga ideas
Using the kinusaiga technique, they not only make paintings and panels, but also decorate boxes, book covers, and even assemble Christmas tree decorations. It is worth noting that you can use paints, felt-tip pens, pencils, add details and fill in the gaps. You can also use padding polyester to add volume and realism to some parts of the picture. And also, be sure to decorate the kinusaiga with decorative elements - beads, beads, sparkles, ribbons... Look through the photo gallery and get inspired by kinusaiga ideas!
Needlewomen know. But many have only heard of what kinusaiga is. The unfamiliar magic word actually means the art of making paintings from silk scraps. A kind of patchwork, only without a needle. This type of needlework was born in Japan. At the origins of kinusaiga was Setsu Maena, a professor at a Japanese university. Over time, kinusaiga spread beyond the borders of their homeland and European craftswomen immediately adopted this technique of creating beauty with their own hands. How can you pass up creating amazing things from scraps and remnants of silk fabric? Simply put, European needlewomen acquired the art of creating masterpieces while saving on expensive materials.
At the origins of Kinusaiga was Setsu Maena, a professor at a Japanese university.
Kinusaiga or patchwork without a needle: details about the technique and tools that are needed
The kinusaiga technique does not involve the use of a needle as in the patchwork technique, but is based on making a sketch on paper, which is then transferred to a wooden board.
A slot is made along the contour of the sketch - a recess. After that, the picture itself is made using scraps of silk. The Japanese women took these pieces of silk from old kimonos, which the thrifty Japanese never threw away - silk, after all.
The shreds are laid out on the cut elements of the sketch and the edges of the shreds are pressed into these same slots. With the right selection of paints and colors, the paintings turn out to be of unique beauty. And it would seem - scraps of an old kimono! We can say that the natural economy of the Japanese became the parent of this art - kinusaiga.
Gallery: kinusaiga (25 photos)


Kinusaiga: master class (video)
How to make a painting on polystyrene foam from fabric with your own hands: a master class for beginner needlewomen
How to make a painting in style New Year in patchwork for children? New Year's patterns always look beautiful and festive. We can talk about the art of kinusaiga for a very long time. But it’s better to see how to make at least a small masterpiece with your own hands. Below is a technique for creating a painting on foam plastic for beginners.
What you will need to start the master class:
- foam sheet (thickness not less than 1 cm;
- scraps of fabric of different colors;
- scissors;
- stationery knife (scalpel);
- nail file (for threading fabric into foam);
- sketch (your own or you can take any ready-made one);
- carbon copy.
The fabric should be selected to be non-stretchable and thin enough. The edges should not fray.
First, look at what is in stock: old scraps, leftover fabrics that were not thrown away after sewing some wardrobe item. Everything will go to work. If checking the storerooms did not give any results, then you will have to take whole pieces and cut out the elements of the planned picture from them.
Process:
First you need to decide on a drawing. For the first time, you should not choose something complex, with many elements. Let these be light geometric shapes. And from them you can already build a small cute house.


Using a sheet of copy paper, you need to transfer the sketch onto a piece of foam plastic.

Using a knife or scalpel, make a cut along the contour of the sketch to a depth of about 3 mm.

Cut the selected fabric into shreds, the right size. Using a nail file or something more convenient, tuck the pieces of fabric into the foam sheet. Thus fill the entire “picture”. The edges of the fabric should fit tightly into the slits.

Cut off the excess edges of the foam with a scalpel or a stationery knife.

Next, the resulting panel can be framed. It can be purchased, or you can make it yourself. If there suitable materials. You can simply make a border using decorative tape, which you need to secure with beautiful push pins. These buttons are sold at any office supply store. Buttons in bronze or gold colors look beautiful.


The kinusaiga technique is often used to decorate lids for boxes or boxes (for example, for sewing accessories or cosmetics).


Amazing Christmas decorations and crafts are made using this technique.

Kinusaiga: simple patterns and their execution
Kinusaiga allows the use of any scheme that is at hand. You can buy templates, or you can make them yourself. The easiest way is to use stencils. As an example, below is a Kinusaiga master class using a simple template.
To complete this handicraft you need:
- A3 size cardboard;
- A4 size cardboard;
- scraps of fabric of different colors;
- padding polyester;
- glue;
- nailfile;
- threads;
- needle;
- scissors;
- acrylic paints;
- thin brush;
- cord (soutache) of different colors;
- pins;
- frame.
Scheme for creating a painting:

In your work, you can use any scraps that you can find.
- The drawing must be transferred to tracing paper. Cut into component parts - parts.
- After the division is completed, you need to number the parts of the drawing. Then cut out fabric elements using them. You need to leave a 3 mm allowance along the edges.
- Then prepare the canvas for the future painting. For this purpose you need to take a sheet of ceiling tiles. The thickness should be half a centimeter. Glue the sheet onto thick cardboard.
- Glue the second copy of the drawing, which was printed in advance, to the foam. Cut a groove in it, the depth of which should not exceed 2 mm, along the contour of the sketch.
- Apply glue along the cut grooves with a glue stick. When performing this Japanese handicraft for the first time, it is recommended to apply a glue stick to the entire surface.
- Next comes the process of creating the appliqué: the edges of all parts prepared from fabric must be pushed into the grooves so that the edges plunge into the grooves and are tightly fixed there.
Some ideas and patterns for decorating a kitchen using the Kinusaiga technique
Below are sketches and diagrams for designing and decorating the kitchen with Kinusaiga paintings.


This whole application is not done quickly, but the result is worth spending time on. Embroidery with needles takes much longer than paintings made using the Kinusaiga technique. When the basic knowledge of the Kinusaiga technique is fixed, you can take on more complex panels and paintings, which will definitely decorate your home and become an excellent gift for any occasion.
With the spread of the art of kinusaiga throughout the world, specialized stores began to open, which began to sell tools for this type of needlework. Also on sale special sets fabrics (not every European has an old kimono at home that can be used for scraps).
In addition to fabrics, you can also purchase combination sets in such stores, which include tools, fabrics and drawings - sketches of varying degrees of complexity. Such sets are designed for both beginning needlewomen and those who have been practicing this art for several days.
Here's what these sets look like:


Despite the fact that the word “patchwork” sounds unusual for many, they have been doing it for a very long time. It means a unique type of creativity. With its help, you can create beautiful crafts that are useful in the household and usefully get rid of old things that accumulate in piles in every home. The scraps are selected according to color scheme and sewn together into something whole. This later turns into much more. Patchwork without a needle does not require sewing. At first glance, its technology is simple. Take scraps, make a drawing and create. However, not everything is as easy as it seems.
How was Kinusaiga born?
If simple patchwork was widespread almost everywhere, then patchwork without a needle was invented in Japan. Maeno Takashi did this, and quite recently, in 1987. The purpose of the new creativity was the same as that of ordinary patchwork - to attach old things somewhere. The main clothing of Japanese women has traditionally been kimonos. Beautiful, soft to the touch, made of expensive silk. Of course, even when they’re worn, it’s a shame to throw them away. So they began to create masterpieces from them, the sight of which will take your breath away. They called this patchwork without a needle kinusaiga.

Despite the fact that this type of needlework originated in Japan, even there few people do it. The reason for this is the great painstaking work involved. Paintings are done only by hand. Therefore, each one, even the simplest in plot, becomes a work of art.
Classic kinusaiga
Patchwork without a needle, the master class for which is given below, is essentially not that difficult to do. The process technology is as follows step by step.

1. Take a board.
2. A drawing is selected.
3. This drawing is applied to a board and paper, preferably tracing paper, because it is transparent.
4. Each fragment is numbered. Check if the numbers on the paper and on the board match. They must match.
5. The paper is cut into drawn fragments.
6. Indentations (grooves) are made on the board along all lines. Their depth should be within 2 mm and their width less than 1 mm.
7. Paper fragments are secured to the fabric with something, for example, pins. the right colors and traced with an allowance of a couple of millimeters along each contour.
8. The pieces are cut out and placed according to their numbers on the board.
9. Using any suitable tool, the edges of the scraps are pushed into the grooves.
All. All that remains is to insert the picture into the appropriate frame.
The complexities of Japanese patchwork needlework

You can’t help but wonder, if patchwork without a needle is so simple, why are paintings in this style so expensive? Their cost starts from tens of dollars, and exclusive works cost several thousand. The fact is that good picture, as a rule, contains a lot of tiny fragments. Sometimes their number is more than a hundred. All these scraps are not arranged haphazardly, but as if an artist were painting an oil painting. The tone of the patches is carefully selected to convey the magical beauty of dawn, the tenderness of cherry blossoms or the beauty of autumn fireworks foliage. This is why real kinusaiga is so difficult. Patchwork without a needle requires a lot of perseverance, care and talent. You can come up with an image yourself, or you can take one ready-made template. But in any case, you need to comply with the combination color ranges, accurately maintain the transition from light to shadow, complete a lot of small details so that the picture “comes to life”.
Where to begin

If your soul has become attached to Japanese patchwork art, but you don’t have any experience or confidence yet, it doesn’t matter. The main thing is there is a desire. Kinusaiga for beginners also exists. Its technology is the same as for experienced craftsmen. The only difference is the composition of the drawing. It is advisable to first choose simple circuits, in which there are few fragments and there is no great need to maintain tones and halftones. In this case, images of animals, for example, a rooster or a parrot, are very suitable. Here you can pick up any scraps, and don’t worry if they don’t fit well somewhere. The main thing is to fill your hand.
You can also recommend making a fly agaric. As they say, simple and tasteful. To make the task easier, it is better to make the red part of the cap not whole, but to break it into several fragments.
Also suitable for beginners are those consisting of geometric shapes- squares, triangles, circles. If you choose the colors well, it will turn out beautiful. Some people like this style even more than classical realism.
Plank substitutes

The more Kinusaiga conquers the world, the more new ideas appear in it. One of the latest is a patchwork without a needle on polystyrene foam. Carving even a simple design on wood is quite difficult. This requires special tools and carving skills. Polystyrene foam is an ideal alternative. The only thing you need to remember is that it is fragile and breaks easily. That's why ready product you will have to attach everything to the same board or to thick cardboard. In addition to polystyrene foam, polystyrene foam is excellent, its texture is more durable. This kind of kinusaiga is extremely convenient for beginners, because polystyrene foam and polystyrene are cheap, and you can train on them as much as you like. Both materials are sold in any hardware store or market. Ceiling tiles without volumetric drawings. At home, they can be cut out in the shape of the future painting using ordinary scissors or a knife. The further technology is the same as with the board.
Volumetric patchwork without a needle

The classic kinusaiga is very beautiful and arouses only admiration. But the inquisitive minds of the craftswomen come up with more and more new variations of it. So, in order to give volume and realism to the images, they began to insert not only the edges of the patches, but also pieces of lace into the grooves. This improvement looks especially beautiful in paintings depicting ladies or children. The angle is chosen such that the face is not visible. The main emphasis is on creating lush frills, ribbons and bows on hats and garters.
Those who use other materials together with fabrics, such as gilded or simple threads, have gone even further. Also, some craftsmen attach beads, rhinestones or beads to a picture already assembled from scraps. More often, such elements are added in children's themes or for decoration. New Year's toys, caskets, gift boxes.
Christmas decorations in the style of Kinusaiga
Using Japanese technology, you can create any objects whose use does not involve mechanical deformation, for example, during a game. So, craftswomen use patchwork without a needle for Christmas tree toys, Easter eggs, gifts for Valentine's Day and other cute things. To make any of them, the same foam plastic is taken, only not ceiling tiles, but pieces of thick slabs. Blanks of the desired shape are cut from them. These can be balls, hearts, cones, or any others. If there is no slab of the required thickness, the workpiece can be glued together from fragments. Further work is carried out according to general principle. Craftswomen for round balls advise using stretch, knitwear or velvet, because these fabrics fit better on the bulges. Some craftsmen glue the shreds to the foam to make them stick better. Such crafts, decorated with gold threads, “snow” made of the same foam plastic, or finely chopped rain, look very beautiful.
Caskets and boxes

To make a beautiful box or gift box, patchwork without a needle is also ideal. Schemes for these products are selected depending on the purpose of the product. If you plan to store jewelry in the box, you can choose a design with an elegant lady or some feminine accessory, for example, a hat. If the box will be used for children's little things, a drawing with a funny animal will do. But more often images of flowers are used for decoration. To simplify the task, it is better to take a regular cardboard box of a suitable size. Cut out rectangles from polystyrene foam corresponding to its sides. If you plan to decorate only the lid, simply cover the remaining sides with matching fabric. You can pre-glue thin foam rubber to the cardboard. Next, the intended kinusaiga is made on the central piece of polystyrene foam, attached to the lid of the box, and the box is ready. To make it look beautiful around the edges, they are decorated with ribbon or braid.
The kinusaiga technique may seem difficult for beginning craftswomen, especially if the edges of the patches do not want to stay in the grooves. Some people try to glue them, but this worsens the final result. It is better to try to make the grooves a little narrower and a little deeper.
When choosing the exposure of a future painting, it is advisable to avoid complex, too fancy forms. Masters create more often landscape compositions or “paint” city blocks, houses and courtyards with patches. You can rarely see flowers in paintings. Even rarer are people, especially faces. After all, it’s almost impossible to make a face made from scraps look like it’s alive.
In order not to make a mistake and not to confuse the scraps, before you start pushing them into the grooves, you need to visually evaluate future picture, because the pieces of fabric are already laid out on the board.
You can add variety to your leisure time different ways. One of the options for what to do in free time, can become handicraft. Experienced craftswomen advise trying your skills in the fascinating technique of patchwork without a needle, or kinusaiga. This style makes it possible to create original and colorful pictures from scraps without using a needle. The technique is not very complicated, but it is still best to take the first steps in this type of needlework by watching a master class for beginners. A little imagination and free time, and the result will exceed all your expectations.
A little about the history of kinusaiga
The unique art of kinusaiga originated in ancient japan several centuries ago, but over time it lost its popularity. Only in the 80s of the last century did patchwork without a needle become relevant again and was revived as a form of creativity.
 Kinusaiga, like patchwork in its classic look, appeared out of the need to save money.
antiquities in the country rising sun, poor Japan, no one threw away old worn out kimonos, because natural silk is a very expensive fabric. Therefore, as soon as the kimono wore out, and this happened quite quickly, its owner, not wanting to throw away expensive clothes, ripped it open, and small things were created from large pieces of fabric, and small shreds were used to make unique paintings, the sight of which was simply captivating spirit. They called this patchwork without a needle - kinusaiga. Of course, you can use not only silk, but various other fabrics are suitable for making masterpieces using this technique. And you can master it using detailed instructions and watching the master class.
Before starting work, the master made a sketch of the design on paper, so that he could later depict it on a wooden board. After the drawing was on the board, it was necessary to make slits along its contour, along which they were made patchwork paintings. The process itself was as follows: prepared pieces of material were pierced into the slots made, and then fastened on the wrong side. A painting made using the patchwork technique without a needle or kinusaiga was both woven and quite durable, and from the outside it looked like a real photograph.
Nowadays, needlewomen very rarely use wood. As a rule, paintings are created on sheet foam.
You can use the patchwork technique without a needle or kinusaiga on almost everything. First of all, of course, for a variety of panels and paintings that can be used to decorate the interior of the room. Also, the needleless technique is used to decorate decorative boxes, caskets, book covers and notebooks, postcards, and albums. Kinusaiga has become widespread in the production of toys for Christmas trees, souvenir Easter eggs, Valentine's cards for Valentine's Day, Patchwork without a needle is also used to decorate furniture and lampshades.
Basics of Kinusaiga: master class for beginners
 The master class, which is presented a little lower, is actually not that difficult to complete. In order to create your own home masterpiece using the patchwork technique without a needle, you will need to purchase a sheet of foam plastic, prepare pieces of fabric, and also have a sheet of cardboard, a simple pencil, a ruler, PVA glue, a scalpel, a metal spatula with one end must be stupid.
After everything necessary materials and the tools will be prepared, let's get straight to work. First, glue the foam onto a sheet of cardboard. This is necessary so that our painting does not fall apart during the manufacturing process, and workplace protect from scratches.
We carry a drawing on the foam. Then we very carefully cut along the drawn contour using a scalpel. We coat the pieces of fabric and foam with a thin layer of glue. Next, place the scraps in place and press them very carefully until the glue dries a little. To tuck the pieces of fabric into the slits we made, you can use a metal spatula with a blunt end.
After the edges of all the scraps have been tucked into reverse side, you can add some interesting elements to the panel. You can place buttons, rhinestones, beads, sequins on the picture, and glue various appliqués on top of the fabric.
In order for the painting to have a finished look, it is best to place it in a frame, which you can also make yourself.
Master class: Easter egg made in patchwork style without a needle
To make a decorative egg you will need: foam plastic in the shape of an egg, braid, glue, a glue brush, a knife, a metal spatula for placing the material in the slots, scissors. 
To begin, measure the egg-shaped foam and draw straight lines on it: one across, one from one end to the other. In places where the stripes intersect, draw lines so that you get triangles of the same size. Then measure the dimensions of the resulting triangles and make patterns for cutting the fabric with an allowance of a few centimeters.
Once the triangles are cut out from the various scraps, take one of them, spread it with glue, and using a spatula, place the triangle in the slots that were made on the foam, stretching the surface of the fabric. Do the same procedure with all other scraps of fabric. If desired, you can decorate the resulting egg with braid by gluing it on top of the scraps.
Advice: this master class can also be used for making Christmas balls and other three-dimensional foam toys.
Kinusaiga schemes for creating paintings


Several exciting ideas for making patchwork-style products without a needle - kinusaiga, master class
Using technologykinusaiga - patchwork without a needleYou can make very colorful panels and decorate boxes. I would like to present you with some wonderful ideas for inspiration, as well as a video master class for visual acquaintance with an interesting process of working on foam plastic.


