The most recognizable fruit, the most recognizable and expensive brand - what is it? Yes, you're right, it's an apple. In the first case - aromatic and tasty, in the second - bitten. So let's learn how to draw an apple!
Living in the vastness of countries former USSR, apples are our native fruit. It is found almost everywhere, it is loved and eaten with great pleasure, being saturated with the beneficial elements contained in it. And when it seems that we know almost everything about this fruit, it will be especially surprising to learn about interesting facts about apples!
- Our elders taught us that an apple must be peeled, since this shell is like “natural cellophane” and it is harmful. I don’t know where our grandparents got such beliefs, because now it is already known that it is this peel that contains the overwhelming amount of fiber and antioxidants for which the apple is famous;
- How long do you think an apple tree can live? 50 or 100 years? The official long-lived apple tree, which still delights with its fruits to this day, was planted on the territory of modern Manhattan already in 1647 by a man named Peter Stuvensant;
- If you want to make a liter of pure apple juice, you will need approximately 35 medium-sized apples;
- If you decide to plant many apple trees in your garden by taking seeds from just one tree, there is a good chance that you will end up with a number of other types of apple trees different from that tree;
- Approximately one-fourth of the mass of these fruits consists of air;
- The oldest evidence for the popularity of apples as a favorite fruit dates back to 6500 BC. This is evidenced by archaeological excavations in Greece and other parts of the European continent.
Well, these are the main ones Interesting Facts about the apples that we managed to dig up! But this is just a prelude, a warm-up for the real thing. Prepare a simple pencil for creating a drawing and colored pencils for coloring it. For the last stage, you can “bring” watercolor or gouache.
So, how to draw an apple
I have already repeated many times that these step by step instructions drawing fruits and berries are very simple. We'll have about a dozen lessons on fruits soon, and then we'll move on to flowers and other plants. And most of the lessons are perfect for beginner artists.
1 - Draw a circle - it will be our sketch.
2 - Then shape this circle into an apple shape.

3 - Draw its upper outline, leaving gaps for the twig and leaf.

4 - Place a twig in the gap on the left.

5 - And on the right is a piece of paper. It also needs to be attached to the branch and the drawing highlighted.


6 - The drawing is ready, all that remains is to erase the excess parts of the sketch and prepare paints or colored pencils for coloring.

7 - All that remains is to color our apple red. We did it!
Basically, you can draw Steve Jobs behind him and "bite off" this apple on one side. This way you can demonstrate how a businessman came up with the idea to call his company this name. This, by and large, is a matter of your imagination. The main thing is that you now know how to draw an apple!
You don't have to be born a genius. It is enough to familiarize yourself with the technique of creating a drawing. Thanks to step by step description, everyone can understand how to draw an apple tree. And most importantly, you can teach your child this simple skill.
An easy way to learn how to draw an apple tree
In order to start creating, you will need two simple pencils, eraser, paints and some free time. Drawing an apple tree step by step will not be difficult. Create a tree trunk. We need to depict a beautiful apple tree.
You need to work hard to create a powerful silhouette of the tree. First, one curved side of the trunk is drawn. Then we depict the second part. It is always necessary to remember that the trunk is the first and important stage when creating our drawing. Therefore, the way the apple tree will turn out will depend on how it is depicted. It is very important to use a pencil with a soft lead so that the lines are light.
Apple tree roots
When the “heart” of the tree is ready, we proceed to the roots. From the trunk there are wavy and smooth lines going down. Our roots belong to the old tree. They have grown deep into the ground. They became a good support for the plant. But over time, the roots grew and began to break out. And the drawing conveys this impulse.
tree branches
Branches are drawn up from the trunk. First we depict large ones, like snakes. Then from each line there is a branch in different directions. And together they resemble the large antlers of an old deer. The more branches are drawn, the stronger and more powerful our apple tree seems.

Crown
In order to create a crown for an apple tree, you need to remember what the clouds look like in the sky. Introduced? Next we will transfer the memories about them to the branches of our tree. And to create the effect of leaves, the upper part of the crown is drawn wavy.
This simple method makes it possible to understand how to draw an apple tree with your child. The resulting masterpiece will be able to add to your child’s home collection of creativity.
Fruit
Already when everyone young artist will want to supplement it with ripe fruits. And the child involuntarily asks the question: “How to draw an apple tree with apples to decorate a picture?”
To begin with, small strokes are evenly applied throughout the crown. These will be the stalks. Juicy apples will be placed on them. Then, under each stroke, round fruits are depicted.

Final stage
When the drawing is completed, it should be decorated. But you need to approach this moment creatively. To begin with, all the lines of the trunk are carefully removed with an eraser, and only then watercolor is applied. This applies to every drawn part of the tree. First, the pencil is removed, and only then the paint is applied. On the sunny side, the paint will be a couple of shades lighter. Aligns to the center. If you paint in this way, you will get the impression that one side of the apple tree is warmed and caressed by the sun.
When a person depicts a picture in stages, it is much easier for him to understand and remember how to draw an apple tree. A step-by-step instruction will become an indispensable assistant when creating your first masterpiece.
As a result, I would like to add: drawing is like mental therapy. It relieves stress and gives complete relaxation to a person. And for a child this is the most best activity, since this skill teaches children to notice all the minor details.
Well, if a novice artist asks his parents about how to draw an apple tree, then this article will always come to the rescue and become a good hint. Experiment yourself and teach this truly wonderful skill to your children.
Svetlana Balabina
Drawing lesson “Apple tree with golden apples”
Municipal budgetary preschool educational institution
"Kindergarten No. 53"
Abstract of OOD « Apple tree with golden apples»
Prepared by the teacher
Balabina S. A.
Arzamas, 2018
Target: skill formation draw a spreading tree
Tasks:
Promote the development of the ability to create fairy tale image, paint spreading trees , conveying the branching of the crown of fruit trees, depict a lot « gold» apples.
Promote the consolidation of skills paint with paints(rinse the brush well before picking up paint of a different color, blot the brush on a napkin, do not paint on wet paint).
Promote development aesthetic perception, feelings of composition.
Encourage a beautiful arrangement of the image on the sheet.
Facilities: illustrations depicting autumn apple trees, watercolors, brushes, sippy cups, napkins, A4 paper, coasters.
Methods: artistic word, viewing autumn apple trees, conversation, dynamic pause "Collect autumn leaves"
Reflection: Whose drawing is the neatest? What was the most interesting?
Progress of OOD
In a certain kingdom, in a distant state, there lived a Gardener. Every autumn they ripened in his garden golden apples. Yes, that's the problem happened: the Three-Headed Dragon flew in and that’s it ate apples, A burned the apple trees. The Gardener became sad and went to the Wizard for advice. The wizard thought and thought and speaks: “I can help you revive the garden, but I need paintings with painted apple trees»
Guys, let's help To the gardener: let's draw apple trees with golden apples! Do you agree?
Where do we start? paint? (we draw apple tree)
Begin paint from the largest object - apple trees. The drawing is located in the center of the sheet.
Let's draw apple tree: first with a brush draw the trunk, branches brown paint.
Then we draw the leaves "dipping". For drawing we need leaves green gouache. At the beginning "dipping" paint the leaves with dark green paint, and then add light green leaves.
We will draw apples with a foam rubber poke.
How draw an apple?
Dip one edge of the poke in yellow paint, the other edge in red paint
(remove excess paint on the auxiliary sheet)
Let's poke "Column" and carefully scroll. It turns out round apple with red side. Oh, how magical apple! Round, golden, with a pink side!
Physical education break.
« Apple tree» Serbian song
Apple tree! Apple tree! Children walk in a circle holding hands.
Where are yours apples? There is one child in the center - « Apple tree» .
Did the frost freeze them? Children stop for every line
Or did the wind carry them away? bend one finger on both hands.
Or did lightning burn it?
Or were they hit by hail?
Or did the birds peck?
Where did they go? They lower their hands and shrug their shoulders.
The frost did not freeze them, These words are spoken by a child - « Apple tree» .
And it wasn’t the wind that carried them away, Children bend one finger on both
They were not burned by fire, hands, starting with the big ones.
There was no hail with rain,
The birds didn't peck them.
The children interrupted! Children run away, child- « Apple tree» trying to tarnish them.
Independent work
Now sit down at the tables and let's draw an apple tree with golden apples.
Who will have time draw an apple tree, the drawing can be supplemented with details
Reflection
Offer to admire the resulting drawings. I will photograph these drawings and send them to the Wizard. The wizard promised to revive apple trees and give them to the Gardener.
The teacher thanks the children for their work.
Publications on the topic:
B]master class for teachers “tree with apples” made from salt dough Compiled by Papsheva Irina Ivanovna Today I want to go to the master class.
Activities with parents of the senior group "Yablonka" Joint event of teachers, parents and children senior group"Apple tree." Quiz on the topic “Spring has come - beauty” Objectives: 1. Consolidate.
 Objectives: - learn to sculpt flat and round shapes, use skills acquired earlier; - develop independence, fine motor skills hands;.
 ED: Hello, dear, welcome guests! Be healthy and happy! And let our meeting be cheerful and joyful, because it is dedicated.
 The developing educational situation in game based on getting to know the environment using a game model in 1 younger group.
 Circle work on modeling from plasticine “Yablonka” Goals: - to develop artistic and aesthetic perception, interest in plasticineography;
“Whoever eats an apple a day never sees a doctor,”- repeats English proverb. If, with these words, you give your friend a basket of sweet apples and a picture of them drawn by you, he will not only be pleased, but also a little funny.
A fruit rich in vitamins, a symbol of fertility, health and beauty, drawn on a large Whatman paper will effectively decorate the kitchen and become a wonderful birthday gift.
Let’s talk today about how to draw an apple correctly, why it doesn’t sink in water and why you need to wash your face with “apple” water.
How to draw an apple with a pencil?
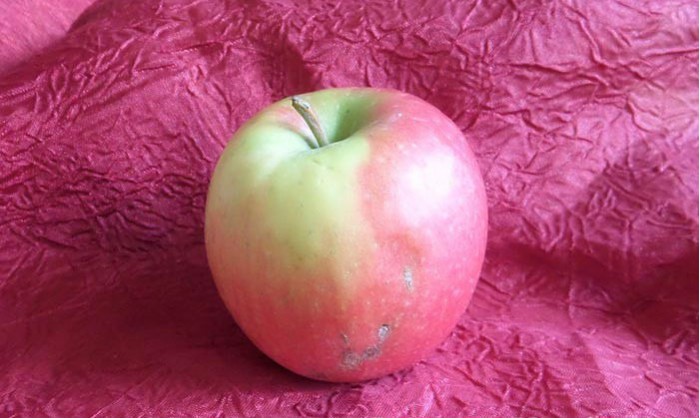
It seemed like there had just been a whole armful of apples, and then you look - only one remains... Great! What you need to learn how to draw an apple from life. For all the little sweet tooths - a simple master class on drawing an apple with a pencil.
1. Look carefully at the apple. What is it: round or oblong? Draw a sketch. In our case, it is an uneven circle, slightly narrowed at the bottom. Mark the surface on which the apple will lie with a horizontal line.
2. Draw an arc on top of the apple - it will visually highlight the hole from which the tail grows. Draw a tail with a leaf. Draw the bottom of the apple in the form of a wavy line. Highlight the highlight area.

3. The most important stage is shading the apple. With its help you can correctly depict the play of light and shadow.
Sharpen a simple pencil well (2H is best) and start shading along the apple shapes, avoiding the highlight area.
4. Don't forget about the shadow. It is also easy to depict using shading. But for the shadow it is better to take a softer and bolder pencil than the one used for shading the apple.
To better highlight the highlight on the apple, use an eraser.

Interesting! Archaeological excavations indicate that humanity has been using apples as food since 6500 BC. And the oldest long-lived apple tree grows in Manhattan, USA. Back in 1647, Peter Stuvensant planted it in his garden. The tree still pleases its owners with juicy fruits.
Apple Drawing Lesson for Beginners
Western Slavs believed: New Year and Christmas, you must wash your face with the water in which the apples lay. It is curious that a quarter of the mass of apples is air. That's why these sunny fruits don't drown in water!
Let's try to draw simple still life with apples. For let's take an example next photo.

1. Look carefully at the image. Which geometric figures resemble apples: circle, oval, trapezoid? Use them to draw a sketch of apples. Don't worry about the lines being uneven - it's even better!

2. Clearly draw the contours of the apples and slices. Use circles to mark the holes from which the tails grow. Don't forget about the leaves, the seed on the lobe and the sepals. Mark the glare area.

3. Erase the auxiliary lines.

4. Make the drawing look natural with shading.

The composition is ready to delight the eyes of your art teacher. But if you want to color the drawing, draw the outlines with a black gel pen and prepare your pencils. , One of my previous master classes will tell you.
When you're done, you should end up with a drawing something like this:

Drawing apples on a branch
Although the homeland of apples is Central Asia, the Slavs have always loved them and actively used them for rituals. By exchanging apples, the boy and girl showed mutual sympathy. By accepting an apple from the guy, the girl seemed to be giving consent to the marriage. How do you like an apple as a wedding invitation? This tradition existed for a long time among the southern Slavs.
1. First, draw five circles (future apples) by hand. Using smooth lines, draw the branches and centers of the leaves.

2. Mark the places of the sepals on the apples with crosses. Draw the leaves.

3. Draw a strong branch on the left - our apples cannot hang in the air.

4. The next stage is drawing the veins on the leaves. Try to maintain symmetry so that the leaves look natural.

5. Apply shading at the bottom of each apple. Clearly draw the branch, sepals, outline the leaves.

6. Lightly shade the areas of the leaves that are not falling. sunlight. At this stage, be especially careful that the light source in the picture is on the right.

The play of light and shadow works wonders! I am sure that your painting will become a real decoration of the living room.
How to paint an apple with paints?
The apple is not only the favorite fruit of millions of people, but also a frequent hero of the Guinness Book of Records.
The largest apple in the world was grown in 2005 by Japanese man Chisato Iwasaki. The amazing fruit from the city of Hirosaki weighed 1.849 kg. But the apple was eaten, and the record was not officially recorded, so now the leadership belongs to the Englishman Allen Smith. The weight of the apple he grew is 1.67 kg.
Don't worry, we won't have to pretend to be a fruit giant. Let's try to paint an ordinary apple with watercolors.
The technique is multilayer and is best suited for those who are comfortable with paints.
1. Lightly sketch out the apple.

2. Use green and orange paints to create a shadow at the tail of the apple. Make sure that the strokes are of different saturations. This will make the drawing look more interesting.

3. Paint the right side of the apple, on which the shadow falls, with yellow and orange shades, and add a little red paint at the bottom. Make sure that the color transitions are smooth.

4. Mix several shades of colors: pink, yellow, red and blue, so that during the drawing process you are not distracted by mixing colors.

5. Using a damp brush, draw a shadow around the apple. Watercolors need to be applied quickly so that the colors flow smoothly into each other.


6. Use warm burgundy paint to draw a shadow. Add yellow color and draw a penumbra.


7. A little more yellow paint- and half the way has been passed!

8. Use cool shades of purple to paint the background around the apple. Make some areas darker.


9. And now - my favorite! Detail the drawing.
First add folds to the tablecloth.


10. Then paint over the tail and add a few stripes on the skin of the apple.

It's amazing how using simple movements With a brush, the apple instantly changed and sparkled with new colors!
11. Using a wrung-out brush, highlight the lower part of the apple - this will make it look more voluminous.

12. Add stripes and dots to the apple. Choose shades that are a shade darker than the primary colors used to paint the apple.

13. Work on the background. Make the flow of colors softer and smoother.

The little apple masterpiece is ready!
Dear friend! If you have not yet had time to give free rein to your legs to run to the nearest garden, and you are reading the material to the end, write in the comments whether you liked the drawing lesson and what other master classes you would like to see on the portal.
pugina love
GCD with children children of the senior group Drawing« Apple tree with golden apples»
GCD as part of the implementation of the program content of the topic "Vegetables. Fruits".
Target. Development of children's productive activities.
Tasks:
Learn to create a fairy tale image, draw spreading trees, conveying the branching of the crown of fruit trees.
Strengthen skills paint with a brush. Learn how to beautifully arrange an image on a sheet of paper. Develop vocabulary.
Cultivate interest in artistic creativity.
Materials for activities: landscape sheet, paints, brushes (thick, thin, jar of water, napkin (for each child).
Progress of activities:
Children come to the board. It contains an image of an orchard without apple trees.
- Listen to the poem:
Our autumn garden is beautiful.
It contains plums and grapes.
On the branches like toys
AND apples, and pears.
And by night a chill blows,
AND yellow leaf rustling at your feet.
We will collect the fruits in the morning
And we'll call all our neighbors.
And let's wave to the sun,
"Thank you, autumn!" - let's say.
Children, what is the poem about? (about the orchard).
Look closely at what is growing in the garden? (children's answers). What is missing in our garden? (apple trees)
But we can fix it! After all, we have brushes and paints that will help us.
Where do we start? draw an apple tree? (children's answers)
let's start draw an apple tree from the trunk, draw the trunk is painted brown, and the crown is removed from the trunk. The crown is the upper branched part, i.e. e branches and leaves.
So from the trunk we paint the branches with brown paint, why do we paint the leaves "by applying" green paint brushes And then ours golden apples gold paint - brush base (where the pile starts) Place it on the sheet and scroll the brush with your fingers. It turns out neat golden, round apple.
Physical education just a minute:
Stretch out your hand (They stretched their hands forward.)
Pick an apple. (Hands in fists)
The wind began to shake the twig, (We shake our hands at the top.)
Difficult get an apple. (They pulled themselves up.)
I'll jump up and extend my hand (They jumped.)
And fast I'll pick an apple! (Clap your hands above your head.)
Take a seat at the tables. Let's remember how we draw? (children's answers).
Rinse the brush well before picking up paint of a different color, blot the brush on a napkin, and wipe excess water from the brush to the glass. Let's get started draw an apple tree with golden apples.
Independent activity.
Guys, who will have time? draw an apple tree, he can complement elements: weed draw, sun, sky, animals)
Children put drawings on the table, where there is a picture of an orchard.
Friends, look how our Orchard! What a great fellow you are! Golden apples, round, large crown.

Publications on the topic:
Educational field “Artistic and aesthetic development” using TRIZ technologies and unconventional ways drawing. Theme: “Magic.
Abstract of the educational activity “Wild Animals” with children of the senior group Goal: To consolidate children's knowledge about animals, habitats and lifestyles. Integration educational areas: artistic creativity.
Summary of GCD for application with children of the older group. (N. N. Leonova “Artistic and aesthetic development of older children preschool educational institutions groups"). Class.
Program content: Consolidating the ability to admire beauty spring nature, children's knowledge about parts of trees. Reinforcing techniques in children.
Notes on drawing in the second junior group "Apple Tree" Notes on drawing in the second junior group "Apple Tree". Goals: to develop the ability to complete a drawing, to draw with fingers (non-traditional.
Summary of educational activities for children of the senior group with general development skills “Late Autumn” Summary of a subgroup lesson for preschoolers with general underdevelopment speech level 3 speech development in the senior group Lexical topic: Late.
Summary of GCD with children of the senior group “Invisible Air” Abstract directly educational activities By cognitive development for children of senior preschool age


