Do you feel like no one needs you? Do people around you not notice you and pretend that you are a double-glazed window? Even your cat doesn’t listen to you, and minibus drivers don’t take money? Don’t be discouraged, because you always have one day a year when mass memories of you gain a very wide circulation. It's your birthday. And in this lesson we will learn how to draw a birthday with a pencil. You can be sure that they will always remember you, they just carefully hide it. They do it especially well social media. With their help, the once family and cozy holiday has gained universal momentum, when they spam your wall with absolutely identical congratulations and pictures. What does a person's birthday mean?
- This is a reminder that we are all mortal. After all, this is not just a birthday celebration, there is only one such day in life when you were born. All subsequent ones are days of aging.
- An adequate reason to be insane all day and barely move your feet. (For some individuals, every Saturday is enough).
Now let's take the pencils and get to work.
How to draw a birthday with a pencil step by step
Step one. Let's draw an oval table with a cake on it. Above the table we need several circles into which we will insert heads and disproportionate ears, and we will place a cone on the duck.  Step two. Let's draw a lot of gift boxes around the table and start creating the faces of cartoon characters.
  Step three. Let's decorate each box with festive bows, poke a few candles into the cake, and draw some tableware for the table too. Let's highlight the kennels of the faces with a thick line.
  Step four. We clear the festive room of unnecessary lines so that only gifts, a table with a cake on them and the celebrants remain.
  Step five. Let's add shadows using shading.
  I recommend that you try to draw this as well.
In childhood, a child does not think about why and what to draw. While drawing, he reworks his life experience, transferring it to paper, and thereby comprehends it and develops.
As you get older, it becomes more and more difficult to find ideas... We get distracted by everyday affairs, we stop hearing ourselves, our inner world. It is especially difficult at the beginning, when you are just embarking on the path of discovering yourself as an artist.
To draw well, you need to draw every day. But where do you get the inspiration for this?
Here are some ideas for you: how and what to draw every day.
What to draw? 11 ideas for daily drawing.
1. Go through the archives of your drawings and sketches.
The simplest thing is to open a folder with your old drawings and look at them.
What is unfinished about them? Where did the hitch occur? 
Look at the drawing with fresh eyes. Think how to modify or rewrite it.
In addition, immersing yourself in past drawings will immerse you in the emotions that you previously experienced. This may reinvigorate your creative muse. Maybe based old idea a new one will arise... And then another picture will be born.

2. Draw something from life.
Take a look around the house: walls, furniture, interior items, potted plants, souvenirs brought from trips that keep your memories. What caught your eye? 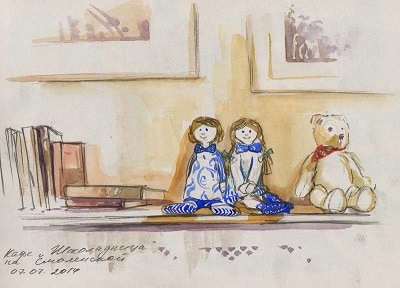
Draw one object. You can add other objects to it and draw the background.
As a result, your drawing can turn out to be very atmospheric, keeping the warmth of the house, your thoughts and memories

I suggest watching a recording of my speech on Periscope on the topic of quick sketches from nature. I hope you find this video helpful.
Sketch of a plant from life
3. Draw an abstract combination of spots.
Unleash your imagination, imagine yourself as a creator and get the most out of the play of color, how the paint flows and mixes, what new shapes and shades you observe. Cast aside doubts and fears. Create! This is great color therapy.
Depict your day, your mood, and capture it in color.

4. Create a hand-drawn recipe.
The process of cooking itself can be very creative. And if you also transfer it to paper... Write down your culinary ideas, make them beautiful pictures, create your unique recipe books. In the future, this will inspire you to continue to create in cooking and drawing.

Don't know how to draw recipes? Watch this video:
Recipe drawing: charlotte with apples!
![]() More interesting and useful information about drawing
More interesting and useful information about drawing
from the artist Marina Trushnikova
You will find it in the electronic magazine “Life in Art”.
Receive magazine issues to your e-mail!
5. Draw a sweet little something for your friends or family.
This could be a postcard for a holiday - for a birthday, for the New Year, for March 8 or Valentine's Day. Or just a cute impromptu for no reason... 
Receiving a handmade card in the age of email is unusual. Such gestures are always very pleasant.
The emotions of gratitude received in return will certainly give you inspiration to continue the creative process.

6. Practice quick sketches.
Draw people and animals using sketchy human and animal anatomical figures.
To complicate the task, use a timer, setting yourself the time for this work in seconds.

In the future, the ability to quickly draw a human figure will inspire you to make quick sketches.
Watching and noticing interesting stories, types and characters, you will be able to draw, snatching scenes from life: on the street, in the theater, in a cafe, at work.
This will allow you to develop yourself, your worldview and the inner feeling of an artist.
Seconds timer:
7. Practice creating monotypes.
Learn to create monotypes. This will allow you to create without initially thinking about the plot. Monotype will do this for you.
Use your imagination! Experiment! A monotype print will give you many opportunities for spontaneous solutions. Examine the image in the spots and streaks that have appeared. And draw in the spots a little to help the viewer see this image.

 Start painting with watercolors today!
Master the basics of watercolor painting with this popular course
“Taming Watercolor”
8. Draw a graphic design.
Love to draw with a simple pencil or in black and white?
Then try your hand at graphics! This can be drawing a spot with further drawing of details with a pencil, gel pen, ink or marker.
Or maybe you will first make some kind of drawing graphically, and then complement it with a background, add volume to the details, fill it, fill it fancy patterns, lines and scatter splash spots.

Practice making doodles!
9. Draw in a travel sketchbook.
Going on a trip? Bring a small sketchbook with you! 
A notebook filled with impressions and drawings (as well as booklets, tickets, receipts, napkins... and other “tourist trash”) will become no less valuable a memory than an album with photographs.

 IF YOU WANT TO:
- learn to quickly record your thoughts and impressions
- remove the fear of drawing in public
- bring beautiful travel books back from travels
then my sketchbooking workshop
will become an invaluable assistant for you in this!
10. Browse the websites of your favorite artists.
Look at their paintings, find something that catches you and touches your soul. Compare different techniques, try to imagine how this or that picture was painted, what the artist felt, what he wanted to say, how he saw the world while working. 
Look at your favorite painting by your favorite artist and try something like this. Or just copy a piece of the painting to study the technique, repeat it as you understand.
Today we have not an easy drawing lesson. We will draw a birthday card that will be perfect for mom or dad, or even someone else. Of course, on your birthday it’s nice to receive a card from your children, especially if it’s made by yourself. And this is not as difficult as it seems, the main thing is to have patience and the desire to please your loved ones. So how can we draw a birthday card to please mom or dad?
Now we will find out everything. On the card we will depict the birthday of Mickey Mouse and his friends. By the way, so you can draw it later.
Let's go directly to the lesson.
Step 1. First of all, let's draw a sketch of an oval table for a birthday. Let's draw a sketch of the cake slightly offset from the center of the table. Above the sketch of the table we draw several circles in one pile - these will be the heads. On two heads we will draw a couple more circles - mouse ears, and on the third we will draw triangular shape– this will be a festive cone.

Step 2. We continue to draw a birthday card for mom (dad). Add sketches of various boxes to the table. We draw the faces of Mini Mouse, Mickey Mouse and Donald. We add caps to the heroes’ heads.

Step 3. We add a ribbon to each box of birthday gifts. Add culinary decorations to the cake and draw holiday candles on it. We show cups and saucers on the table. We draw pompoms at the ends of the caps. We finish drawing the hands of the heroes.

Step 4. Now we take the eraser in our hands and begin to erase all the extra lines from the pencil. After that, we once again outline the main elements that we drew: guests, boxes with birthday gifts, table, cake and dishes.

Step 5. Let's add some shadows to the picture of our postcard.

But a drawn birthday card won't be complete unless it's colored. So we take out pencils, markers and paints and begin to carefully color the drawing. This hand-drawn birthday card will surely please mom and dad.
If it is difficult to draw such a birthday card for mom (dad), then you can get by with simplified versions by watching video tutorials.
This video tutorial shows how to draw a birthday cake that would be enough for a greeting card.
And this video shows how to draw a cake with balls. Even small children can draw such a postcard.
Yes, the lesson was difficult, write down whether you were able to draw a similar postcard or not.
Everyone wants to give their beloved mother a gift that will make her happy. Sometimes you really need to prepare a drawing for her. This article will tell you how to draw a gift for mom.
Drawing “Me and Mom”
Very young children really want to express their boundless love and affection for their mother in a drawing. Therefore, they usually do not face the question of giving it as a gift for their mother. Of course, this will be the picture where the most beautiful woman in the world smiles joyfully and holds your hand tightly best child in the world, that is, the author of this masterpiece.
But you should not limit this topic to age limits. And old enough children may well turn to this topic. And they might even end up with a pretty good drawing. And if the situation with artistic talents is, to put it mildly, not very good, then the picture will come out with humor, since you can draw a gift for your mother in the style of a “kalak-kalyak”, imitating the kids.
Mommy will be happy with flowers, that’s a fact!
But you shouldn’t be too zealous in showing your humor. Perhaps the child still has some rudiments of the talent for depicting on paper, since to draw a gift beautifully means to make to a loved one pleasant. Moreover, you can not just hand your mother a sheet of paper with a drawing, but paint, for example, a glass or tray, a wall plate or a kitchen board.

Since drawing a gift is all about flowers, here is a master class on how to draw a rose. If desired, the donor can make a postcard with his own design.
Step-by-step instructions for drawing a rose
Anyone who does not know how to draw a gift will cope with the task easily if he strictly follows the instructions.
- At the top of the sheet there is a slightly inclined oval with horizontal elongation.
- From the edges at the widest point of the oval, two asymmetrical arcs are drawn down, which are parts of a circle of large diameter.
- From below, the ends of the arcs smoothly connect - the lower part of the flower is formed.
- Below are two open rose petals.
- The middle of the flower can be made in the form of a rolled up roll. It is depicted like a snail curl.
- Several small leaves of the peduncle will decorate the lower part of the bud.
- Since it is best to draw a gift for mom in the form of a rose in a naturalistic way, you should depict the stem of the flower.
- A few thorns and leaves on the stem - and it’s almost ready.
- Now everyone understands how to draw a gift for mom step by step. You need to color the rose with pencils or felt-tip pens, but you can also use paints.
Cute little animals will delight mommy!
If the question of what gift to draw for your mother has not yet been decided, experts advise: there is nothing more pleasant than receiving a picture of a cute animal as a gift. It could be anyone - a bunny or a fox, a puppy or a kitten, a squirrel or a bear cub. It’s great if the animal holds a flower, a heart, a cake or a box with a gift beautifully tied with a bow in its front paws. Since you can draw a gift for mom not only on paper, but also on fabric, you can use acrylic paints or specially designed for matter.

as a gift for mom
- The head is depicted in a circle.
- An oval is placed horizontally at the bottom of the circle.
- Inside the oval, another smaller oval is inscribed. They should touch with their upper parts. This will be the tip of the nose.
- The eyes are drawn in small circles, painted black, leaving small areas - highlights - unpainted.
- The bear's ears are semicircles. They are drawn at the top of the head.
- The body of the bear is drawn with an oval slightly larger in size than the head.
- Two small ovals are inscribed inside it on opposite sides - the front paws of the animal.
- The hind legs are depicted as straight segments parallel lines. The feet are also oval.
- The section of the mouth and claws on the paws are depicted with smooth lines.
- The bear cub can hold any symbol of a gift in its hands.
- You can paint the animal as the artist’s imagination dictates.
Wonderful handmade card
It is appropriate to draw a birthday gift on thick cardboard, make a bright congratulatory inscription and fold the sheet in half. This will make an excellent card. Inside you should write warm words of congratulations and wishes.
Mothers are touched when they see funny ones. Why not draw in this case a cute little elephant with a trusting look and naively raised eyebrows?
Sketch of the head and legs of a baby elephant
Not everyone can do it beautiful drawing. But I really want to please my mother! But how to draw a gift step by step? Simple and detailed master class images of a baby elephant will help you cope with the task.

- A circle is drawn at the top of the sheet.
- They make “dents” in it on the sides, highlighting the baby elephant’s cheeks.
- On the top of the head - in the upper part of the circle - swirls are drawn.
- Mark the direction of the back of the sitting animal with a line from the head down.
- It's quite easy to depict the baby elephant's front leg.
- The second front leg is located slightly obliquely to the first, they seem to cross, with the first protruding slightly forward in relation to the second.
- The baby's plump tummy is outlined with an arc from below.
- The hind legs are spread out in different directions, the baby elephant seems to be doing the splits. For the leg whose foot is slightly turned towards the viewer, there is no need to draw the foot itself.
Full outline of the baby elephant without drawing out the features of his “face”

- The animal's foot is depicted as an oval. The artist paints nails on everyone with arcs four legs baby elephant
- A baby elephant's ear is shaped like an egg with its pointed end pointing down. The line of the head near the ear that is closer and in full visibility should be erased at the junction with an eraser.
- In each ear, an internal contour should be drawn that follows the external one.
- You should mentally divide your head vertically into four parts. In the lower part is the base of the trunk, and the upper line falls exactly on the division point.
- Along the trunk there are small arcs representing skin folds.
- Near the end of the bottom line of the trunk, a smile is indicated by a small arc.
- An oval is drawn at the end of the trunk - the nasal opening.
The final stage of working on the drawing

- Two ovals, slightly inclined in opposite directions with their upper parts, represent eyes.
- Inside them are the same ovals, but smaller.
- In each eye, a small circle is drawn in the upper part. These circles should be slightly shifted to the side, and in both eyes to the same one.
- Eyebrows are drawn in arcs above the eyes.
- Eyelashes in the corners of the eyes look charming. And even though in reality elephants do not have eyebrows or eyelashes, people often transfer features of their appearance onto animals.
- Since it is best to draw a gift in color, the picture should be colored. Inner part ears are decorated pink, pupils (inner oval) - black. The circles in the eyes will act as reflections, so you should leave them without color. But the baby elephant itself can be painted in any color, because it is not a real animal, but a symbolic one. Therefore, it can even be polka dots or stripes, like in a real fairy tale.
The best gift is considered to be one that is made with your own hands. What can you present to your friend for his birthday? The gift can be anything, but it should be supplemented with a postcard. What to draw for a birthday? We have collected best ideas cards, get inspired.
Funny owl
What should you draw for your friend's birthday? Try to draw a funny owl. This bird is a symbol of wisdom, and such an allegory will certainly flatter your loved one. How to portray her? Everything is very simple. First you need to draw a large circle. It will be the sun. Now we draw an oval - this is the body of an owl. Immediately draw the falling shadow of the bird. We will focus on the eyes. We depict them in the form of two huge circles. We duplicate these geometric shapes two more times, gradually making them smaller. Let's finish drawing the beak; it will look like a diamond. Let's schematically depict the paws. They will look like a flower with three leaves. On the belly we draw feathers with a wavy line. And the look will be completed with owl ears and a festive cap. We draw all this with triangles. We depict wings with two ovals. One of them needs to be bent so that it looks like the owl is holding the strings from the balls with its wing. Now let's move on to the image of holiday paraphernalia. We draw balloons and a plate. All this needs to be depicted as ovals. All that remains is to draw a festive cupcake. If desired, it can be exchanged for a pie. Don't forget the candle. You can schematically draw one, or you can depict as many of them as the age of the birthday boy. All that remains is to color the drawing. You can use our sample or use any other color scheme.
Jar of jam

When you're wondering what to draw for your mom or sister's birthday, you can draw something unusual. For example, a jar of jam. How to draw her? Draw a large circle. Now we draw an oval below and erase the lines that appear at the intersection. Just above the circle we draw another oval. We pull two rectangles down; from the last one, a trapezoid-shaped skirt should diverge downwards. We make the edge of our lid wavy. We decorate it with lace. The base is ready. Now we need to decorate it. On the jar we draw raspberries or other berries of your choice. We draw flowers on the ribbon that decorates the jar, and use them to decorate the space below. You should not depict only one inflorescence. Draw several flowers with leaves at once. Well, the main thing left is to depict the label on the jar. We write “Happy Jam Day” in beautiful handwriting and draw a berry. The outline of the label can be “quilted” with strokes. It remains to give our image color, and greeting card will be ready.
Cake

If a child thinks about what to draw for his grandmother’s birthday, then you can give him an idea. For example, draw a cake decorated with candles. We write on the top of the sheet multi-colored pencils congratulatory words. This could be the phrase “Happy Birthday” or its English variation Happy birthday. Let's start with the image of the cake. We draw a semicircle and depict its lower part with a wavy line. You should get something similar to glaze drips. It is not necessary to draw the cake itself, but if desired, you can outline it with two straight lines going to the edge of the sheet. Place candles on the icing. There can be any number of them, or you can draw as many as the birthday girl is old. We light the lights on the candles and add decor in the form of wavy lines that will symbolize the exploding firecracker. You can add colored dots or stars to the card.
Air balloons

How to draw a birthday card so that it looks original? Everything is very simple, you need to combine the drawing and glue the applique on it. Let's start with its manufacture. Take a sheet of paper watercolor paints and a toothbrush. Wet the brush in water, dip it in any bright paint and spray it on the sheet. We perform this operation several times with different colors. We wait until the paint dries and cut out the contours from the sheet balloons. In our case there are 4, but you can do more or less. Now we need two sheets of paper: one colored, the other white. The white sheet should be slightly smaller. Glue the two blanks together so that the colored edge looks like a passe-partout. We glue our balls on top of the sheet, and draw wavy lines from them with a black pen. We write a congratulatory phrase at the bottom of the postcard.
Laconic drawing

What can you draw for your birthday? Today minimalism is in fashion, so we will depict the postcard in this vein. Let's draw a birthday cake. But the image will be very sketchy. Even a person who cannot draw at all can cope with this task. Visually divide the sheet into three parts. The first of them will be occupied by an image of a culinary masterpiece. Draw a thin rectangle with rounded edges. We draw the same one on top geometric figure, only wider. We draw a stripe in its center. The cake is ready. We draw a candle schematically. It will look like a rectangle with a thin stick on top. We add a sparkle to the candle. It will be a droplet with rays diverging in different directions. Now let's move on to the congratulatory inscription. In English it will look more stylish. That's why we write Happy in block letters on the second third of the sheet. From the word to the left and to the right we draw two thick stripes. On the last third part of the sheet we draw the word Birthday.
You no longer have to think long and hard about what to draw for dad’s birthday. Just give him this card.
Congratulatory bear
How to draw a birthday picture? There is nothing complicated here. Let's depict a cute bear holding a gift in his hands.

We will make it in the form of an application. First, choose paper with a wood texture. Let it be heterogeneous, somewhere lighter, somewhere darker. Let's draw a rectangle on the sheet, slightly expanding downwards. We will draw two circles on its upper corners. This is the body of a bear. Draw an oval on dark brown paper. This will be the nose. We cut out our blanks and glue them onto Blank sheet paper. We draw the eyes with two dots and draw the nose with a large drop. If you wish, you can draw a smile on the bear. Having retreated 2-3 cm from the application, we write a congratulatory inscription. Glue a square cut from any wrapping paper onto the bear. From it we cut out flags that we will “hang” at the top of the postcard.
Card with flowers

What should I draw for my mom's birthday? Well, of course, flowers. They can be depicted as realistic, or, as in our case, decorative. At the bottom of the sheet we draw a line that will combine straight and zigzag segments. This is grass. We write congratulatory words at the top. And in the middle we draw sticks on which we depict flowers of various shapes. These can be bells, roses, daisies. To make the card look more delicate, you need to color everything in one color scheme. And to fill the space between the colors you need to draw fancy curls with a black pen.


