25.01.2017 28.01.2018
Hello to all Photoshop lovers!
Drawing a straight line in Photoshop is not at all difficult, just move the mouse cursor, but, alas, this movement does not always turn out straight. In this lesson we will learn how to draw straight lines.
To make the line in Photoshop smooth, hold down the keyboard SHIFT and you will draw a straight line in Photoshop. This allows you to draw straight horizontal and vertical lines. You can also draw diagonally; to do this, click the left mouse button once on the area where the line begins, and a second time where it ends (with the SHIFT). This will draw a straight line at the given coordinates.
There are several ways to draw straight lines in Photoshop, giving them color, thickness and other styles. The following tools are commonly used: Brush, Pencil, Pen, Line, Rectangular Marquee. Which tool is best suited for the task is up to you to decide. Each method has its pros and cons.
Draw a straight line with the Brush Tool
The easiest way to draw a line is with a tool Brush (Brush Tool). Create a document in Photoshop (Ctrl + N) with an arbitrary size, I have this 800x600 pixels:
Activate the tool Brush (Brush Tool). Tool hotkey - B.

At the top settings panel change tools if necessary size And rigidity brushes:
We draw the line:

Somehow it’s not quite even, you’ll reasonably notice, right?
To draw perfectly straight line, you need to hold down the key before starting to draw Shift, draw a line and release the key. This is how smooth the line turned out:

Keystroke method Shift before starting to draw a line, it helps to draw a strictly horizontal or vertical line at an angle of 90 degrees, but if you need to draw a line, for example, diagonally, then you must first click the mouse button at the beginning of the line and hold down the key Shift, draw a line, then release the mouse button and Shift.

Draw a straight line using the Pencil Tool
Tool Pencil Tool is in the same tool group as the tool Brush, tool hotkey - B.

Drawing a line using the tool Pencil Tool similar to drawing Brush- click the mouse at the beginning of the line, hold down the key Shift and draw a line.

Draw a line with the Pen Tool
To draw a line with the tool Feather It will take a little more time than in previous cases.
Activate the tool Pen Tool tool hotkey - P.

Don't forget to make sure that the tool Feather is in mode "circuit". You can view this at top panel instrument settings:
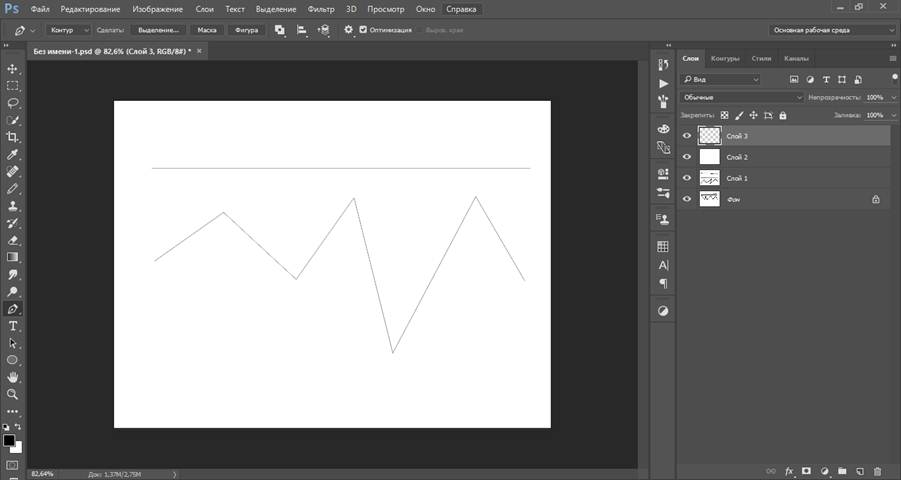
Create a new layer, click on the layer creation icon in layers panel:

Draw a straight line - just put two points. To draw a horizontal or vertical line, hold down the key again Shift:

To start drawing a new line, hold down the key Ctrl and click on the canvas; if this is not done, the lines will be created continuously.
Draw arbitrary curved lines and hold down the key at the end Ctrl with a mouse click on the canvas to complete the lines.
The lines are ready, but, unfortunately, they are only visible in Photoshop in the tab Outlines (Window-Paths), if you save the image, for example, in jpg* format, the lines will not be displayed.


In order to make them visible, we return to the tool Brush, V top panel adjusting instrument settings size, brush hardness and if necessary, select the brush itself. We will need a round brush:

Choose a color:

Activate the tool Feather, right-click on the canvas and select “Stroke Path”:

The following window will open in which you need to select as the source "Brush", and a tick "Simulate pressure" (Simulate Pressure) It is advisable to remove it to get straight lines:

Result:

If you leave a checkmark “Simulate Pressure”, the lines will become thinner towards the ends:

Draw a line with the Line tool
One of the most common ways to draw a straight line in Photoshop is the Line. Located in the left panel:

The great thing is that you can easily adjust the color and thickness of the line:
With the clamped SHIFT I draw straight lines. They are created by the shape from vector tool. You can easily draw a vertical, horizontal and a straight line at a 45 degree angle.
.jpg)
Straight line using selection in Photoshop
It happens that you don’t want to bother with the settings of vector shapes and brushes. Therefore, you can simply select the desired area in Photoshop, for example, in the form of a line and fill it with color.
There is a Rectangular Marquee tool in Photoshop:

For example, we need a long and thick line in Photoshop. Select the desired area:

Choosing a tool Fill and set the color for future line.
.jpg)
Fill the selected area with color and deselect it CTRL+D. We have a straight line.

Like these ones simple ways draw a line in photoshop. We hope you found this information useful! Good luck in your creativity and good mood!
MS Word can be used not only to work with text, but also to create drawings. Of course, its set of tools is much inferior to specialized programs, but if you need to add to a document a simple picture or a figure, then Word’s capabilities will be sufficient.
Enable the Draw panel
You can draw in Word in two ways: manually and using templates.
Many users do not know about the ability to use tools for drawing, similar to those found in standard Paint. The thing is that they are hidden by default and to start working with them, they must be enabled. It is also worth noting that the manual drawing function has become available only in latest versions"Vorda."
To enable the Draw panel, select Options from the File menu. Then in the dialog box that opens, click on the “Customize Ribbon” line. Among the main tabs in the right column, check the box next to "Drawing" and click OK to apply the changes.
How to draw in Word?
After turning on the "Drawing" panel, a corresponding tab will appear in the document, after clicking on which the following tools will become available:
- "Select" - allows you to select an already drawn element.
- “Draw with your finger” - allows you to draw arbitrary lines in Word.
- "Eraser" - removes unnecessary objects or elements.
How to draw in Word using these tools? To do this, select "Draw with your finger" and draw the desired line on the touch screen. If you are using a regular screen, you use the cursor to draw the line.
In addition to these tools, Word has a small selection of pens available. They differ from each other in line type and color. If you need to set the color and thickness of already created lines, this can be done using the appropriate tools on the panel.
The Transform group tools are needed for editing text and creating notes. For example, you can use Freehand Editing to underline a word, circle part of the text, add an arrow, or highlight errors.
The Convert to Shapes feature allows you to create an object from a sketch. After this, the drawn element can be moved, resized, rotated, or applied other manipulations available for shapes.
The last tool of the group allows you to enter the required symbol or mathematical sign.
How to draw shapes in Word?
In addition to drawing by hand, MS Word has a fairly wide selection of shapes that you can use to create simple illustrations for text.

Before you can create a drawing from shapes, you need to add a drawing area. To do this, first in the "Insert" tab, click on the "Shapes" item. Then click on the "New Canvas" line in the pop-up menu. This action will add a drawing area to the page. Its dimensions can be changed by dragging one of the corners of the area in the desired direction.
Working with Shapes
After creating the canvas, the “Format” item will be added to the top panel with basic drawing tools.
After clicking the "Shapes" button, a window will open with big amount objects. These will include lines, arrows, circles, standard shapes, stars and flowcharts.
How to draw lines in Word using these shapes? First you need to select the line you are interested in, then move the cursor to the area to draw and stretch the line to the desired length by holding down the mouse button. In the same way, you can draw arrows in Word and other elements.

There are two additional buttons to the right of the Shapes menu. If you select the first one, a drop-down menu will appear. The "Change Shape" line from this menu will allow you to completely replace the current object with another. The "Start Modifying Nodes" line allows you to modify the shape you have selected at specific points.
Another button next to the Shapes menu allows you to add text. After clicking on it, a field will appear in the indicated place in which you can enter the desired text. It can be moved if necessary.
Adding styles and effects
The Shape Styles tool group allows you to select the fill and outline color of the created shape. To do this, use the corresponding button to the right of the standard shape styles.
It is not necessary to use the standard one color scheme for shapes, it can be replaced by clicking on the "Other colors" line. A gradient or texture can also be used as a fill for a shape.
Using the Shape Effects key, you can modify the selected object by adding a shadow, highlight, emboss, smooth, or rotate.
The WordArt Styles tool lets you apply an effect to text that you insert using the Add Text Box feature.

The Arrange tool provides a number of options that let you reposition a shape, rotate it, align it, or add text wrapping. This feature also allows you to overlay shapes on top of each other.
The Resize tool allows you to change the width and height of an object. If desired, you can install exact value these settings or change them manually.
IN Adobe Photoshop there are a huge number of built-in functions that can be used to create various objects, photo retouching and more. A novice user who has just begun to comprehend the basics of this program would do well to consider the problem of how to draw a straight line in Photoshop. And those who have been in this environment for a long time may be interested in remembering the basic ways of drawing a straight line. One method or another will be useful in individual cases.
How to draw a straight line in Photoshop?
There are many ways and techniques for drawing various lines and elements. But before you draw a straight line in Photoshop, you need to keep in mind that there are three basic and quick ways to draw lines: the Brush, Pen, and Line tools. Despite their simplicity, it can be assumed that everyone has their own drawing technique and each user chooses the tool himself, guided by his preferences and the task that faces him.
Brush tool
The simplest and most understandable method is drawing using the Pencil and Brush tools in Photoshop. It is worth keeping in mind that these tools draw and do not create some kind of object, so the image of the lines will be on the selected layer itself. You can avoid this situation and draw the line on a separately created layer. In this case, you can edit the brush mark without restrictions without harming other layers.

To draw a line, just select the Brush or Pencil tool. Then click on the left mouse button and use the cursor to set the direction of the line. In addition, you can use the right mouse button to open an auxiliary window with settings, where you can select the type of brush, determine the hardness and shape of the tip.
A straight line can be drawn using the tool in question using the method of multiple magnifications of the image. The closer the image is, the greater the chances of drawing a more or less straight line manually. A perfectly straight line can be created by holding down the Shift key and using the same Brush/Pencil tool. Having activated the desired tool, hold down the left mouse button and the Shift key - we observe the construction of a straight line, controlled by the cursor.
Line tool
There is another way to draw a straight line using the Line Tool in Photoshop. The quick access panel includes a block that combines a number of geometric tools, including the one under consideration. The created lines will be distributed into new layers, which will be formed automatically after constructing a straight line.
Before drawing a straight line in Photoshop, you need to select the tool of the same name and click on the left mouse button at the point where the beginning of this element will be. To complete the construction, you need to click on the LMB again.

The convenience of this method is that lines can be combined into a common layer and provide full editing of a group of constructed elements. The merged layer, after finishing work on it, can be rasterized, but work with the merged elements in the format vector graphics It won't work anymore. You can format a rasterized layer in the same way as others. Another advantage is the fact that you can edit the lines themselves without losing quality. The vector line editing menu is located at the top of the program - its header. Here you can set the line color, its outline, shape and thickness.
Pen tool
A universal tool for creating shapes of varying complexity. With this function and the multiple magnification method, you can select new figure hard-to-reach areas in the image. So, for example, you can draw both straight lines in Photoshop and curves. Mastering this tool is extremely important - it is used everywhere in many creative works, when it is necessary to cut out an image or create a new graphic interpretation.
How the Brush and Pen Tools Work Together
Using a pen, you can easily draw a straight line in Photoshop. To do this, you must first select the “Brush” tool, where using the right mouse button, a dialog box opens and the desired hardness, size and color of the future line are entered. Now you should activate the Pen tool in the quick access panel (in addition to the regular pen, there are other types of the Pen tool in the block, but we won’t need them). Let's put it first reference point in the place where the beginning of the line should be. Then we put another point - the end of the line.

The Pen tool does not create a work object, but only a path. In order for the user to turn the path into a real object, he needs to stroke the path. The Paths panel is located by default in the lower right corner, where layers are usually located. In this window, select the "Contour" tab, where you can see our work contour. Right-click on the outline and select "Stroke Outline". In the Photoshop window that appears, the brush is in the box by default - you don’t need to change anything, just confirm the action.
Of course, one of the simplest and most frequently used elements in drawing is the line. Adobe program Photoshop is no exception. Especially if you plan to seriously study the field of website design.
One of the advantages of the Photoshop program is the interchangeability of actions. You can achieve the same result with many different in different ways. Now we will study several options for command sequences with which we can make a line in Photoshop.
Let's start by creating a new document. A document size of 1000 by 1000 pixels is quite suitable for us. Detailed description Creating a new document in Photoshop can be found here.
Let's start with the line tool. We will find it on the tank panel.
Now let's set the characteristics of our future line.
Let's set the line thickness. I decided that a thickness of 4 pixels would suit me. If you wish, you can choose its style. I'll make do with the simplest ones.

Let's decide on the color. You will also find the primary color selection icon on the sidebar. By clicking, a window for choosing a color is called up.

Well, that's it now! Let's draw. Click on the work area and draw a line with the mouse.

Now our line is a smart object. You can turn it into a regular layer in the layers window using the “rasterize layer” command.

The line is ready. As you can see, drawing a straight line in Photoshop is very easy. We have discussed an elementary method, which, despite its convenience, has a number of limitations. Let's take the second one apart and draw a line using the pen tool.
It should be noted that in this case it is worth changing the settings of the brush or pencil to suitable ones in advance, because your line will repeat these outlines. Therefore, let's set up the pencil tool together. Select it in the sidebar. And click on the work area.

Set the following pencil settings. How to choose a color is mentioned above.

In the sidebar, look for the pen tool.

We make two clicks on the work area. It should be noted that if you want to make the line smooth and strictly horizontal or vertical, hold down the shift key while clicking.

Click on the line with the left key. In the drop-down list, select the “outline outline” command.

We trace the outline and click again with the left mouse button. Select the “delete contour” command.


So, the line is ready! In just five minutes we learned two ways to draw a straight line in Photoshop.
As you probably already understood, the Word text editor is a multifunctional program, and, perhaps, at first it is very in vainly underestimated by many users. Of course, in some cases it is still better to use the same Excel, but, in general, Word is able to cope with many tasks.
With its help, you can always draw up a document beautifully, making it seem deliberately businesslike, or, conversely, making it informal. You can work with tables, change the text style, etc. In addition, the Word interface is thought out to the smallest detail; it allows you to find in a matter of seconds necessary tool for work. By the way, you can even draw a line in Word if you suddenly need it. Actually, we’ll talk further about how to draw a line in Word.
Method one
In fact, in almost any controversial situation that arises in Word, there are several options for getting out of it. And this is very good, because each user can choose what he likes and suits him best. So, let's start with the first method, in my opinion, very simple and understandable to everyone.
Let's imagine that you have typed some text and you need to highlight it with an underscore. To do this, we do this: select the text, then in the “Home” tab on the toolbar we find the “Font” block. There are three buttons: bold, italic and underlined, and if you also need it, you can do this through another menu. Accordingly, just click on the last button, as shown in the screenshot below.
Method two
This method is even more functional. It will come in handy in situations when you want to draw one or more lines in any area of the sheet, and it doesn’t matter whether it’s horizontal, vertical, crosswise, or something else. Do this:
- There is an "Insert" tab in the toolbar, open it.
- There is an “Illustrations” block, which has a “Shapes” button.
- By clicking on it, find a straight line among the proposed ones. Click on it the moment you need to insert a line into the text. Note that you will have to specify two points: where it will start and where it will end.

Method three
This text editor provides another tool that is useful for quickly creating lines. To draw a line, place the cursor in the desired location, then click on the “Borders” button, which is again located in the “Home” tab. After this, a horizontal line should appear across the entire width of the sheet. 
I hope you liked one of these ways to draw a line in Word. Choose any one and feel free to experiment!
Video to help


