Congratulations on Victory Day can be different: beautiful poems, solemn speeches, touching postcards, cute handmade crafts. But there is also a special type of congratulations on May 9, which has long become traditional on this day. We are talking about posters and wall newspapers, without which not a single Victory Day celebration takes place in schools and kindergartens. It may seem that today the poster for May 9 looks like an outdated echo of the past. But in fact, posters dedicated to victory contain something that you will not find in any other type of congratulations. This is a unique combination of visibility (photos of heroes, excerpts from front-line magazines, letters, etc.), gratitude (words of gratitude, touching poems) and creativity. In our article today you will find several poster templates that we hope will inspire you to create your own greeting.

Beautiful poster for May 9th with your own hands - step-by-step instructions with photos
This version of the congratulatory poster for Victory Day is very simple in design. We will mainly use paints to create it. But if you want to add dimension to the poster, you can replace the drawn St. George’s ribbon with a real ribbon glued to whatman paper.

Necessary materials:
- whatman
- simple pencil
- eraser
- paints and brushes
- military photos

Cool do-it-yourself poster for May 9 “Victory Day” - step-by-step instructions
Our next version of the congratulatory poster will resemble the first one in terms of execution technique. There will also be photographs of heroes and hand-drawn congratulatory inscriptions. But besides this, we propose to make this poster for May 9 more informational and interesting by adding to it a list of hero cities and portraits of Heroes of the Soviet Union. And to make the poster also touching in the end, let’s not forget to place a beautiful poem on it.

Necessary materials:
- whatman
- pencils or paints
- simple pencil, eraser
- PVA glue
- photos
- colored paper (optional)
Step-by-step instructions for making a poster for May 9:
- The poster will consist of 5 zones, into which we mentally divide the Whatman paper. The largest and most informative will be the middle of the poster - it consists of 3 parts. The upper and lower zones will be smaller, about 1/5 of the width of the middle one. To begin with, we display the inscription “May 9 – Victory Day!” at the top. On the sides of the inscription we draw St. George ribbons, folded into traditional loops.

- Then, in the upper part of the middle zone, we mark with a frame the place for the congratulatory poem. It can be decorated with paints or colored paper. We fill it with a beautiful verse.

- Below we make a similar rectangular zone for the names of hero cities. In total, 13 cities of the former Soviet Union were awarded this unique title: Brest Fortress, Moscow, Leningrad, Odessa, Kiev, Sevastopol, Volgograd, Murmansk, Kerch, Minsk, Tula, Smolensk, Novorossiysk.

- Now we place military-themed photos to the right and left of the central part of the poster. For example, portraits of Heroes of the Soviet Union, familiar veterans, grandfathers and grandmothers who went through the war.


- In conclusion, we draw two Eternal Flames, a St. George’s ribbon and the inscription “Thank you” below. The original and informational poster for May 9 is ready! photo 6
Hello, dear readers!
I don’t know about you, but at our school preparations have already begun for one of the most important holidays of the year - Victory Day. Many interesting events are expected, including a hand-made wall newspaper competition, in which we are taking part.
Our poster for May 9 is already ready, and during the work we made a master class on how to make it for you. I hope it is useful to someone.
So, working on a poster begins with choosing a topic. We had three for consideration:
Articles on these topics have already been written and posted on the blog in the “Projects” section. In general, we thought, and chose the theme “Hero Cities”.

The basis for our poster is a sheet of whatman paper in A1 format - this is the largest possible. In our work we also used:
- sheets of plain white A4 paper;
- colored paper (black and orange);
- orange gouache;
- black marker;
- black tea bags;
- scissors, ruler, brush, pencil, glue.
Now let's show the work step by step.
In our opinion, a poster without a frame looks somehow unfinished. That's why we started with the frame. Black and orange colored paper was cut into strips 5 mm thick. We took one sheet of each, there were enough strips, there were even some left over.

These strips were glued along the edge of the poster in the form of a St. George ribbon. There was space left at the top for the title.

The title “Glory to the Hero Cities” was first written in pencil, then the letters were colored with gouache and outlined with a black marker.

The base is ready.
Let's move on to the internal content of the poster. There are only 13 hero cities. And for each city we decided to make a separate piece of paper on which the name of the city is written, a brief description of the feat of the townspeople is given, and there is a photograph from the war.

Texts, photos and titles were typed in advance on a computer and then printed on a regular printer in A5 format. If you suddenly decide to make a similar poster, then at the end of the article I will post a link to download the document.
Of course, one could glue the leaves to whatman paper and be done with it, but it’s not that interesting. Therefore, we decided to age the leaves with cities. Make them look like vintage newspapers. They aged paper using tea. There is a blog about how to make old paper, so I won’t go into detail here. I'll tell you briefly.

First, we tore off the edges of the leaves with our fingers and made them uneven. The main thing here is not to overdo it and not tear off a piece of text. So, be careful.

Then we crumpled the leaves.

Literally, they first crumpled it in their fists and then smoothed it out.

Then they dipped them into the tea leaves, kept them there for 15 minutes, took them out, dried them and ironed them. Thanks to this tea bath, the leaves acquired the required “old” appearance.

Time to glue the sheets to whatman paper. You can place them however you like. We placed Moscow in the center, with Smolensk and Kerch in the lower corners. These three sheets are glued to the Whatman paper completely, with their entire back surface.

And we glued the remaining 10 sheets diagonally, with a corner. The leaves jump on each other. Therefore, only the upper part of the sheet was smeared with glue. So that you can lift the top leaf and read what is written on the bottom. This design adds interactivity to the poster and makes it more attractive to children. Thank you very much to our dad for the idea!

Stars were used as decorative elements, which were also first printed on paper and cut out. And then they glued it and outlined it with a red pencil. Although you could just draw them.

And the poster for Victory Day is ready!

The beauty of it is that it is fast, simple, quirky and informative.
And here is the previously promised link to download the archive of files with hero cities and stars. Enjoy it for your health!
Happy creativity!
Hello dear readers! Very soon May 9 will come - the Great Day of Victory over the Nazi invaders. This means that kindergartens and schools are already preparing in full for this long-awaited holiday. They make cards and crafts, including St. George ribbons, make themed pendants, and prepare for the holiday assembly and open lessons.
How to draw a poster with children in kindergarten
It is very important to teach our children about the memorable dates of our history during the Second World War in order to systematize knowledge about the main dates and the heroism of our people. So that they remember and respect the heroes of the front line and home front, our veterans, and love their country.
Before the celebration, children at the preschool educational institution have conversations on military topics, learn poems, listen to songs and, of course, draw pictures, thus creating an exciting acquaintance with the military period of that time.
So, how to draw a poster? Where should you start? And initially, you should start by inviting the children to draw simple single compositions with a pencil, such as the eternal flame, festive fireworks, military equipment, red star, St. George’s ribbon, etc. For children in the younger group, you can print out ready-made templates so that they can decorate the drawings with colored pencils or felt-tip pens, and maybe with watercolors.

You can offer to make a postcard; to do this, hand out white A4 pieces of paper or a regular landscape sheet to the children, and have them fold them in half to form a book. On the front side there will be a composition in pencils, and in the spread there will be the text of a beautiful poem and congratulatory lines. The kids who already know how to write write themselves, and the kids paste the printed verse into a postcard.
The teacher, of course, helps and explains with an example which colors are best to use so that they combine harmoniously and do not overwhelm each other. If it is fire, fireworks, a trail from a rocket, recommend choosing rich shades and pressing harder on the stylus so that bright flashes remain. The volumetric number 9 and the inscription are best done using a stencil, and the St. George’s ribbon blowing in the wind will look harmonious next to it. You can also outline the outline of the inscription and drawing with felt-tip pens, and paint over the inside with strokes with colored pencils.
I suggest drawing the Eternal Flame with pencils. This is a simple drawing that is not difficult to complete, you just need time and patience.

- First of all, we need to draw two intersecting lines in the form of a cross in the center of the sheet

2. Then draw a rectangle, this will be a bowl from which the flame of the eternal fire will flow.

3. Then we draw two small triangles that extend from the rectangle, this will be the star on which the bowl stands.

4. Now we connect our triangles with two straight lines and as a result we get an acute angle, and if we take a closer look, we have a star, wasn’t it at all difficult?

5. Add two more thin lines

6. Excess lines need to be removed with an eraser, they are easily erased, the main thing when drawing is not to press too hard on the pencil lead.

7. It’s time to draw the flames, you should start on the right side and gradually move to the left, then remove all the extra lines with an eraser. The pictures below show everything step by step:


8. This is the flame we should get

9. Now draw the outline of the fire inside

10. In order for our Eternal Flame to look believable, we should also draw a contour inside the fire and in the star itself, so it will look like a real one.

That's all, our drawing is ready, now all that remains is to paint it beautifully and carefully, as in the very first photo!
I am sure that many children will not limit themselves to single compositions, but will want to complement their drawing, so they should be shown an example of how to draw military equipment, airplanes, the St. George ribbon, carnations and everything that is associated with the Great Patriotic War. And let them show their imagination and complement their poster.
This template shows step by step how to draw an airplane easily and simply, following it you won’t have any difficulties:

Below are two options for how to draw a tank, the first example is easier, the second option is more difficult. Give preschoolers the right to choose, and if necessary, be sure to help with difficulties.


It’s very easy to draw the St. George’s ribbon along the lines with a pencil, look at the sample and repeat, nothing complicated, but how much joy the kids will have that they succeeded!

It’s also not at all difficult to draw a carnation; this flower often complements drawings and crafts on the theme of the Great Victory

I found children's drawings for Victory Day on the Internet, maybe they will inspire little artists:
- Eternal flame

- Military plane and tank

And this is how a kindergarten-age child sees the beginning of the war:


I also wanted to tell you three life hacks on how to simply and easily draw beautiful fireworks with toddlers. Everything is very simple, we need a toilet paper or paper towel roll, scissors and several colors of paints, in our case it is yellow, red and green.
From one edge in a circle we cut the sleeve into thin strips lengthwise, as shown in the picture, then we pour paint into flat saucers and begin to create a fireworks masterpiece. Alternately dip a paper blank into the paint and stamp fireworks on a white sheet. That's the whole trick, but how colorful it turns out!

Also, when drawing fireworks, we really need a dish brush, the principle of action is the same as with a paper blank, but it also turns out very interesting, only in this creation we will add more blue color:

Well, I left this drawing idea for last - it couldn’t be simpler, we will draw these magical, multi-colored lights using a fork, yes, you read that right, this is the cutlery that will help us create! Look what comes out of this, it’s really wonderful!

These original, colorful fireworks will decorate any drawing for May 9th, write your opinion, what do you think of this idea?
In addition to fireworks, kindergarten kids will be interested in decorating military-themed templates; the most interesting and beautiful ones are presented below...
- the soldier is the fundamental symbol of Victory, which reflects courage, willpower and heroism, because it was the soldiers who held the victory over fascism in their hands.


- The dove is a symbol of peace, peaceful life! He is often depicted in drawings dedicated to the Great Victory, which symbolizes the end of the bloody war and the beginning of a happy, calm life.

- Fireworks are a symbol of joy and delight! An invariable attribute of the Victory Day celebration, which solemnly marks the end of hostilities and victory over the enemy.

We were able to find such interesting and exciting drawing ideas for children in kindergarten.
Wall newspaper for school on the theme of the Second World War 1941-1945.
73 years have already passed since Victory Day and, unfortunately, very few participants who fought for our Fatherland, for our future, for a peaceful sky remain alive. But we remember these tragic years, the feat of people who did not spare themselves - they fought, we remember the Victory and at what cost it was achieved. And they must tell their children so that they know and honor the heroism of their ancestors and are grateful for freedom, for peace on earth.

Our children should know about the valor of the Warriors, about the Great Victory, about the heroism of their people, so that the connection between generations is not interrupted. To instill in children love for the Motherland, patriotism, and respect for veterans.
The wall newspaper will help schoolchildren express all gratitude, respect and memory to their great-grandfathers and great-grandmothers. It depicts the history of the war, the general Victory, and warm words to the participants in this terrible battle.
It’s actually not difficult to create such a poster; you just need to approach this matter creatively. Very often the work is done on whatman paper or on the reverse side of the wallpaper. This canvas is decorated with appliqués, carnations in different techniques, photographs of soldiers during the war, and a St. George ribbon is always present.
Necessary materials:
- Whatman paper - 2 pcs. A1 and A2 format
- Cardboard - 2 pcs. red color A4 format
- gouache + brushes for painting
- eraser
- 2 tea bags + container
- scissors
- ruler
- stationery knife
- St. George Ribbon
- cotton fabric
- old newspaper
- lighter
- foil
- red and blue floral paper
- old photos of the war years (black and white)
- military poems

Stages of work:
- First of all, I suggest aging the paper, making an imitation of a soldier’s diary or letter. To do this, we need strong tea, brew 250-300 ml per 2 tea bags in a deep container.

2. While the tea leaves are cooling, I propose to start marking whatman paper. On sheet A1 we need to mark out a place for an excerpt from the soldier’s diary. To do this, attach sheet A2 to our Whatman paper and circle the borders.
Marking should be done in free space - on a desk, or if the dimensions of the sheet exceed the diameter of the table, then it is better and more convenient to place it on the floor.

3. We retreat 15 cm from the top edge and draw a line under the inscription “Victory Day”

4. By this time, the tea leaves have already cooled down and it’s time to age whatman paper A2. We need to apply the tea solution evenly using a brush or sponge, at your discretion.

To enhance the “aging” effect, you need to wrinkle the paper.
5. We begin to create the number 9, they will be the size of an A4 sheet and extend one third beyond the frame of the poster.

6. We draw a nine using an ordinary saucer, or you can use a compass and cut out a nine along the outlined contour.
Don't forget to place cardboard or other hard support underneath the paper to avoid scratching the table.

This is what should happen

7. On the rest of the red paper, draw the word “may” approximately 7*20 and cut it out with scissors along the outlined contour.
8. Now we return to the diary, until the sheet is dry, tear it off a little at the edges and burn the edges with fire using a lighter, giving a voluminous effect. Look how this sheet looks now compared to white paper.

9. Next, draw a clear blue sky - a symbol of peace. We will draw using the wash technique. Let's prepare white and blue gouache, a cotton napkin and a sponge, oh, and we also need to grab clean water. We dilute the paint into a liquid mushy state and apply the paint with a small brush over a large area, creating the effect of graduated color, painting from left to right, from top to bottom.

10. After the base is completely painted over, give a little time for the paint to dry a little and begin to remove the dark streaks that the gouache leaves with a wet napkin, making the color uniform.
11. Now that our sky is ready, let's start drawing clouds with a sponge.
Important! In order for the cloud to be airy and jerky, the sponge must be dry, the paint must not be diluted, and the Whatman paper must be damp

12. Leave the Whatman paper until completely dry.
13. Now you need to find a sincere poem about the war and write it by hand on an “old” piece of paper
14. Paste a photo of the war period and begin to cut out a star from 7*7 cm foil using a stencil and a stationery knife.

15. The base has already dried and now you can glue all the blanks.

16. The time has come to create tulips from corrugated paper; making them is not at all difficult, so I suggest watching a video with a step-by-step description. Master class of a flower with candy, in our case this delicacy is not needed, so we make a tulip without sweetness.
17. When the paper flowers are ready, we begin to write the inscription on the poster; for this you need to draw letters approximately 5 cm wide and 7.5 cm high.

The wall newspaper for Victory Day is ready!

Video on how to design a poster for May 9th with your own hands
In this video you will see a step-by-step description of how to create a poster for Victory Day. In fact, it is not difficult and schoolchildren starting from 2nd grade can cope with this task. And if this work is collective, then the children will complete the task assigned to them with interest.
Here are a few more options for designing a newspaper for Victory Day:
This poster is designed by gluing individual elements in the form of photographs, poems, carnations, and St. George's ribbon onto whatman paper. “May 9” was made using the trimming technique.

This wall is dedicated to the theme: “Children of War.” It also consists of poems and photos that can be found in Yandex albums. This creative work expresses gratitude, respect and memory to those children who had a terrible childhood. They drank the entire cup of wartime, the cup of hunger, humiliation, bullying, torment, suffering, insecurity and this list goes on and on...

The newspaper is drawn with colored pencils and contains trimming elements.

The poster below on the theme "War through the eyes of children" contains children's drawings that are glued to a large sheet of paper. The guys need to draw a picture on a military theme in advance, and then assemble them on one Whatman paper.

Collective work of schoolchildren, which is dedicated to the heroes of the Great Patriotic War

This publication has come to an end, and let’s end it with a poem:
Neither children nor adults need war!
Let it disappear from our planet.
Let the peaceful stars shine above us,
And friendship knows no boundaries or barriers.
We want to live under a peaceful sky
And rejoice and be friends!
We want it to be everywhere on the planet
The children did not know war at all.
And no matter how many years have passed since the end of the War, we will always remember our Victory. Low bow to all those who defended it!
We remember!
Front-line veterans who fought on the front lines were often reluctant to remember and talk about combat operations. But memories of the happy day of May 9, 1945 always occupied a significant place in their stories. About the great joy, the desire to live, love, create, which then gripped all people; about the unprecedented universal positive energy of this bright day. We reflect particles of this energy today in special posters and wall newspapers for Victory Day.
Look at what design options for holiday wall newspapers your colleagues found, what wonderful drawings and collages they created. All publications in this section are illustrated with photographs.
Draw a holiday of great victory with MAAM!
Contained in sections:Showing publications 1-10 of 534.
All sections | Victory Day. Wall newspapers and posters for May 9
Hello dear colleagues and guests of my page! Every year our institution holds competitions and concerts on the Day of Kindness and on the Day of Blind People. November 13 - By decision of the World Health Organization (WHO) It was this date that became the basis for the establishment of the International...
 As part of the implementation of goals and objectives in the work on the Project "I'll tell you about the war" We introduced the children to the people of Mytishchi, Heroes of the Soviet Union, who during the Great Patriotic War gave their lives and died defending our Motherland from the fascist invaders. We told...
Victory Day. Wall newspapers and posters for May 9 - Children's master class on manual labor - creating a poster “Animals during the Great Patriotic War”
Publication “Children’s master class on manual labor - creating a poster “Animals in...”  As part of the work on the long-term, comprehensive, informational and educational Project “I will tell you about the war,” we told the children that those who we always lovingly call “our younger brothers” fought alongside the soldiers at the front - these are our family animals, beasts and...
 Image library "MAAM-pictures"
 educational psychologist Nadezhda Igorevna Zvereva For the Day of Mental Health, at Intellectual+, we designed a social poster “My Inner World” with students in grades 7-8. The teenage period is considered a “crisis”; this assessment is due to many qualitative changes in...
 As part of the Safety Week, the group carried out work to develop theoretical knowledge among preschool children about life safety, which can help in dangerous and life-threatening situations, as well as to form a clear division of actions into bad and...
 Photo report September 3 “Day of Solidarity in the Fight against Terrorism” Creation of the poster “We are for peace! No to terrorism!” Ionova Lyubov, Vikhareva Yulia. September 3 is a memorable date in Russia. This is a day of solidarity in the fight against terrorism. And this date is associated with tragic events...
Victory Day. Wall newspapers and posters for May 9 - Wall newspaper for May 9 “Oh, war, what have you done, vile one”
 Before celebrating Victory Day on May 9, preschool educational institutions hold conversations with children on military topics, learn poems, listen to songs and, of course, draw pictures, thus creating an exciting acquaintance with the military period of that time. It is very important to dedicate our children to memorable dates...
In addition to postcards and crafts for Victory Day, they make posters that decorate the walls of the festive hall. A bright, beautiful and original poster for May 9, which depicts the symbols of the holiday, written congratulations and words of memory? makes it clear to adults and children what the war was like and what place this spring holiday occupies in our lives.
DIY posters for May 9 Victory Day
An original beautiful poster dedicated to the Victory Day can only be made with your own hands. Only in this case will he carry emotions. Today we will get acquainted with the works that schoolchildren completed during drawing and labor lessons especially for the celebration of Victory Day.
Poster. Drawn with pencils with letters and numbers pasted on


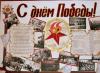
And this poster on the theme of May 9 is made in a retro style. It seems to take you back to distant war times. It's not difficult to make. The base is painted with watercolors, and an aged sheet with poems is pasted on top.

This wall newspaper is made very beautifully and original. The poster harmoniously combines a drawing and an applique of flowers and St. George's ribbon.

The following example is made from children's drawings and newspaper clippings pasted onto whatman paper.

A very original poster with flowers, stars and a poem written, dedicated to the deceased warrior, the grandfather of the author of the drawing.

Such hand-made posters for May 9th Victory Day are the most truthful and sincere. They contain the whole history of the Victory, its importance in the life of every child.
Poster templates for May 9, photo
When you don’t have the time or opportunity to draw and glue a poster for May 9, you can always cheat. Thanks to special computer programs, beautiful templates are created that can be easily colored with paints, colored pencils, and felt-tip pens. You can paste applications and postcards onto these poster templates for May 9th. To design a poster, simply print out the finished drawing (on several A4 sheets), stick it on whatman paper and paint it beautifully. If you manage to find a color template, then you don’t even have to color it: just add poems, stick on a few applications or leaflets. Today we will look at ready-made templates that you can use to create your own unique poster. There are two types of templates - black and white and color.
Black and white outline poster templates
The template depicts a soldier in military uniform holding a dove of peace.

A soldier is also depicted here, and next to him is a bouquet of spring flowers.

Carnations with St. George's ribbon.

A heartwarming template for a poster for May 9, in which a veteran grandfather holds a little boy in his arms.


Now let's look at color templates that do not need to be painted, but can be supplemented with three-dimensional elements.
Red background with a St. George ribbon and a scarlet star on it. Here you can add a congratulation or stick flowers.

Lots of red stars placed in a circle on a white background allow you to add a little more color.

Another similar option. This poster would be great to complement with photographs or excerpts from soldiers’ letters.

To prevent the carnation on a black background from seeming too mournful, dilute the design with bright colors and some kind of positive card (for example, with white doves).

On such a template you need to paste a photo of dead soldiers - war heroes.

Posters for May 9 based on such templates look no less beautiful and festive than original ones.
Cool and beautiful do-it-yourself poster on the theme of May 9, video master class
This video describes in detail how to make a cool poster dedicated to the anniversary of the Great Victory. Making such a masterpiece with your own hands is quite simple.
Necessary materials
- paper
- paints or pencils
- photographs of the war years (for the poster, make scanned copies of them)
It is likely that every family has several such photos in their home archive, because the war affected everyone. Such a cool and beautiful poster on the theme of May 9, Victory Day with unique retro photographs will not let you forget how important this holiday is not only for veterans, but for all humanity.
Thanks to the video master class, we learned how to make a poster for May 9th - large, colorful and unique. In the photo we showed how you can make such a masterpiece using a template or draw it yourself.